Post by jerahteo on Apr 17, 2006 8:05:02 GMT 8
Some Updates of my ride. Just installed whitesnail SJ CAI. Good mod to do , love the ready power feeling. Below are some shots which I took during the installation.
CAI Pipe with whitesnail R&D cylinderical air receiver tank(White in colour). The height of the air intake was place in a safe height. The headlamp unit was first remove , so that the the air receiver tank unit can be placed. It is very well secure with bolt and nut to the main frame of the car chassic.

Another shot of the SJ CAI

The other end of the SJ_CAI pipping.

Whitesnail also help me to cover up the air filter box openning.

Overall , I was very happy with the installation.
'---------------------------------------------------------------------------------
New Update 25 Dec 2006
Added simple decal on my her body. Its more like to cover up a small scratch above the fuel cover. Above the yellow strip @ the fuel cover region is a white Reflective material Picanto word which did not appear very visible here.

Change my fuel cover too. Can;t resist the transparent fuel cover despite the price but I really like the look.

I can;t help not changing my rim. The old one is really very difficult to clean as there are many spoke. Therefore for my new rim I choose only four spoke. That really make my cleaning much easier. I had it change at Poh Heng. Trade in my stock and top up another $250. This rim is super light it brand is Rota model is Auto-X.

Changed my VS from Z-Stab to ITune. I must say its really worth the money as it really help. Notice the red button that is added to switch to spec 2.

Overview

'-----------------------------------------------------------------------------------
Updated Photos of my completed Spoiler. Also an exploded view of my modified sports exhaust tip.

Close up view of my spoiler

'----------------------------------------------------------------------------------
This is hopefully my last project that I am going to engage...
Project Lead by Express Motion "R&D Team"
Modification of Non Pica Spoiler to be fitted on to our Pica
From my old spoiler......

To this new to be modified spoiler

... Tape and Hole Alignment guide put in place for ready for drilling.

...View from Top

...View from bottom, look at that beautiful profile of the spoiler !

...drilling process heart pain man !!! But no problem they are in good hand.

...after drilling four solid holes, the spoiler is then mounted and ready for modification to the support bracket.

....they have skillfully constructed the supporting bracket on to the existing body of the spoiler. It was using something with fibreglass material to construct what you see is the finish product after the construction.

.... Next, once the supporting bracket is set, the spoiler will be removed and send for spraying of my cobalt blue colour T3.
To be continue........
---------------------------------------------------------------------------------------------
My attempt to build my own LED Side Mirror Signal Light
5 holes of 5mm drilled and ready to insert the LEDS

LEDs inserted into drilled holes

Waterproofing with hot silicon glue, underside of the cover

Tested LED with external battery show the LED light up

This is how it look like our manual side mirror internal components, silver wire are for connected to the lever is for adjusting our side mirror. Have to drill a hole to allow wiring into the cabin fusebox area. Tough job.

This is how it look like after assembly of the LED side mirror signal light

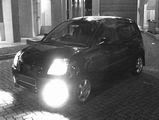
Overview of my car, poor image as it was taken at night at the multi-storey car park.

Many thanks to tazteam Philip, who had provided me all the necessary technical information.
Another chapter of my Picanto MOD .....
27th June... Finally a new look of my interior. Change my fabric seat to semi leather. Did my seat @ www.8cushion.com for $680. It allow you to design and combine colour of your liking. The part which in contact with the body are leather with pores. The blue part are German import synthetic leather with printed gradiant pattern.
Front Seat

BackView of Front Seat

Passenger Seat Area

DIY my own Neon effect but not with Neon tube but LEDS. Purchase from Sim Lim Tower @ $13 each. Purchase 4 strips of the below.
LED Strip of 15 Diffuse LEDs Ready to be used for 12V car supply

LED lighted Up !

Overview Effects

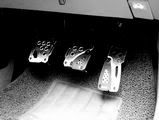
LEDs Shinning on my Pedals

DIY a switch $2.50 from Sim Lim Tower as well to turn off the light in the day. Got the same colour as my car, blue switch.

My New Elevo (Ducaro Model See Website for more www.elevopst.com/steeringwheels9.htm). My is the Carbon Fibre version not even updated in the website yet. Which just arrived and available from Stamford for $110 but given a 10% discount from a sweet girl.
Elevo - Ducaro

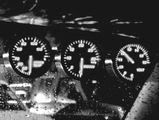
DIY self spray my Meter Cover , but somehow the colour looks darker

Night View of my Picanto thingypit... background my gauges and my PDA Navigation System , GPS on my dashboard.

Back View showing my new Third brake with word "Picanto Extreme" light up when the brake is apply.

Close up view of my third brake light

Add something to my fuel cover.

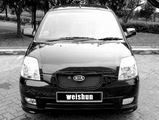
Side

Front

CAI Pipe with whitesnail R&D cylinderical air receiver tank(White in colour). The height of the air intake was place in a safe height. The headlamp unit was first remove , so that the the air receiver tank unit can be placed. It is very well secure with bolt and nut to the main frame of the car chassic.
Another shot of the SJ CAI
The other end of the SJ_CAI pipping.
Whitesnail also help me to cover up the air filter box openning.
Overall , I was very happy with the installation.
'---------------------------------------------------------------------------------
New Update 25 Dec 2006
Added simple decal on my her body. Its more like to cover up a small scratch above the fuel cover. Above the yellow strip @ the fuel cover region is a white Reflective material Picanto word which did not appear very visible here.
Change my fuel cover too. Can;t resist the transparent fuel cover despite the price but I really like the look.
I can;t help not changing my rim. The old one is really very difficult to clean as there are many spoke. Therefore for my new rim I choose only four spoke. That really make my cleaning much easier. I had it change at Poh Heng. Trade in my stock and top up another $250. This rim is super light it brand is Rota model is Auto-X.
Changed my VS from Z-Stab to ITune. I must say its really worth the money as it really help. Notice the red button that is added to switch to spec 2.
Overview
'-----------------------------------------------------------------------------------
Updated Photos of my completed Spoiler. Also an exploded view of my modified sports exhaust tip.
Close up view of my spoiler
'----------------------------------------------------------------------------------
This is hopefully my last project that I am going to engage...
Project Lead by Express Motion "R&D Team"
Modification of Non Pica Spoiler to be fitted on to our Pica
From my old spoiler......
To this new to be modified spoiler
... Tape and Hole Alignment guide put in place for ready for drilling.
...View from Top
...View from bottom, look at that beautiful profile of the spoiler !
...drilling process
heart pain man !!! But no problem they are in good hand. ...after drilling four solid holes, the spoiler is then mounted and ready for modification to the support bracket.
....they have skillfully constructed the supporting bracket on to the existing body of the spoiler. It was using something with fibreglass material to construct what you see is the finish product after the construction.
.... Next, once the supporting bracket is set, the spoiler will be removed and send for spraying of my cobalt blue colour T3.
To be continue........
---------------------------------------------------------------------------------------------
My attempt to build my own LED Side Mirror Signal Light
5 holes of 5mm drilled and ready to insert the LEDS
LEDs inserted into drilled holes
Waterproofing with hot silicon glue, underside of the cover
Tested LED with external battery show the LED light up
This is how it look like our manual side mirror internal components, silver wire are for connected to the lever is for adjusting our side mirror. Have to drill a hole to allow wiring into the cabin fusebox area. Tough job.
This is how it look like after assembly of the LED side mirror signal light
Overview of my car, poor image as it was taken at night at the multi-storey car park.
Many thanks to tazteam Philip, who had provided me all the necessary technical information.
Another chapter of my Picanto MOD .....
27th June... Finally a new look of my interior. Change my fabric seat to semi leather. Did my seat @ www.8cushion.com for $680. It allow you to design and combine colour of your liking. The part which in contact with the body are leather with pores. The blue part are German import synthetic leather with printed gradiant pattern.
Front Seat
BackView of Front Seat
Passenger Seat Area
DIY my own Neon effect but not with Neon tube but LEDS. Purchase from Sim Lim Tower @ $13 each. Purchase 4 strips of the below.
LED Strip of 15 Diffuse LEDs Ready to be used for 12V car supply
LED lighted Up !
Overview Effects
LEDs Shinning on my Pedals
DIY a switch $2.50 from Sim Lim Tower as well to turn off the light in the day. Got the same colour as my car, blue switch.
My New Elevo (Ducaro Model See Website for more www.elevopst.com/steeringwheels9.htm). My is the Carbon Fibre version not even updated in the website yet. Which just arrived and available from Stamford for $110 but given a 10% discount from a sweet girl.
Elevo - Ducaro
DIY self spray my Meter Cover , but somehow the colour looks darker
Night View of my Picanto thingypit... background my gauges and my PDA Navigation System , GPS on my dashboard.
Back View showing my new Third brake with word "Picanto Extreme" light up when the brake is apply.
Close up view of my third brake light
Add something to my fuel cover.
Side
Front


 all the add-ons u spent 2000 on them?
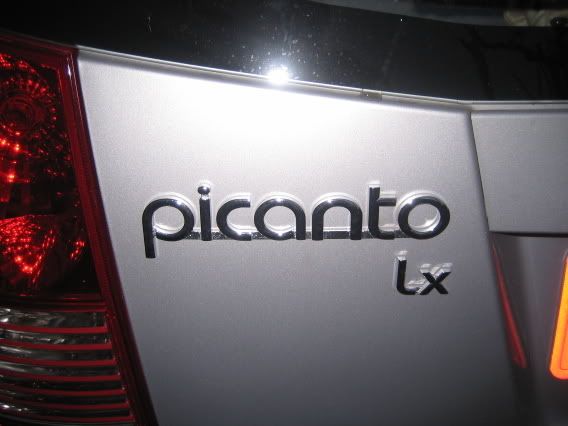


![[Melvin] aka [GhostFace] Avatar](http://i32.photobucket.com/albums/d46/meowbean/CopyofDSC00019a.jpg)